Showing posts with label sewing. Show all posts

Thursday, September 18, 2014

DIY Fabric and Marbles Necklace

Who doesn't love a new piece of jewelry?!
For everyone who mentally responded "me!" to that question,
then this post is for you!
 

The only thing better than 'new' than 'free',
and that is pretty much what this DIY Marble Necklace amounts to...just pennies!

I'm sure y'all have seen these marble necklaces all over Pinterest.
But at the risk of being redundant,
I'm going to share my own post on the subject.

All you need is...

  • fabric, cut into 2 1/2 x 45 or 60 inches long
  • marbles {you can buy a bag at the dollar store}

Equipment

  •  ruler
  • scissors
  • sewing machine


1. Cut
For a choker or high collar necklace {about 25 in. long}, I cut my strip 45 inches long.
For the longer necklace I sewed several strips together to make a tube 60 inches long.
This may seem really long, but once you start tying knots, it shortens up quite a bit.

2. Sew
First, if you are sewing strips together length wise,
sew these first, right sides together.


Next fold your piece in half length wise (right sides together) and sew up the edge
using a 1/4 inch seam.


3. Turn
Turn your tube right side out.


4. Stuff and Knot
Put in your marbles and tie knots after each one.
 Experiment with the spacing between marbles and knots.
Be sure to leave enough fabric on either end to tie your necklace around your neck.


This necklace was done just by tying knots right after each marble, close together.


This necklace was done by leaving a gap in between the marble and the knots on either side.
The next marble was tied tightly, followed by another marble with loose knots on either side.

I really like how this changed up the look.
I even made a bracelet to match!
{Recognize those clothes? It is this refashioned outfit!}


On my third necklace, I tied it the same as above, but made it longer,
and only added marbles and knots to the bottom half.
I LOVE that silky, multicolored fabric, it makes a great necklace!

After making my own, I helped my little sister make one too,
which she proceeded to wear both night and day (no kidding, she slept in it!) for probably a month.
She loved it so much, she made one as a Christmas gift for her best friend!

 How about you?
Have you tried this Pinterest project yet?

In case you haven't,
consider this your official nudge in the ribs.

Monday, March 10, 2014

Refashion Webinar with The Renegade Seamstress!

Most days I feel like a very little person in a busy world,
and then instances come along which snap that feeling to pieces.
One of those is the fact that I'm acquainted with such a talented person
like Beth, The Renegade Seamstress, who was recently asked
by BurdaStyle to host a live Web Seminar on refashioning!

BurdaStyle.
You guys, seriously! 
So exciting!

Have you ever wanted to learn how to refashion your wardrobe?
With this new Webinar, Beth will show you how to do just that!

For those of you with a visual learning style,
this will no doubt be a great tool, 
that just might hold the key to helping you step into the world of refashioning.

If you want to read what Beth has to say about it,

To find more information on the upcoming web seminar,
follow this link to BurdaStyle.

Here is a brief overview of the course.

Refashion: Inspiration and Projects 
to Revamp and Recycle Your Wardrobe
By Beth Huntington

 cardigan-conversion-after-5

Live Web Seminar Date: March 31st
Start Time: 11am EST (4pm GMT)
Length: 60 minutes
 
What You’ll Learn:
  • Reasons why refashioning is one of the most exciting movements in sewing today
  • Where to find inspiration
  • How to find great pieces at the thrift store
  • How to organize your stash
  • How to get over the fear of making that first cut
  • How to bring new life to second hand clothes
  • How to refashion a too small dress into a dress made just for you 


 Congratulations to Beth for such an exciting opportunity,
one I hope may interest some of you!
Go check it out!

Saturday, March 8, 2014

Bloggiversary and Giveaway!
{CLOSED}

Guess what?

Today marks the Two Year Anniversary of this little blog!
I started this blog at about 1a.m. on the morning of March 8, in 2012!
Back then, this blog was a place to share my thoughts and lighthearted little ramblings,
but, since refocusing and taking blogging seriously last spring,
it has really transformed from it's humble beginnings!
 So really, I only feel as if I have been blogging for one year, not two. 

As a way of saying thank you
for being such a wonderful community of blogging friends,
I am having a giveaway!

Honestly,
this anniversary kind of snuck on me,
so I wish I had more to offer you,
but I think someone out there might be excited to receive
some Vintage sewing patterns!


Giveaway!


As you can see,
two are Simplicity dress patterns from the 60's
and the third is a Vogue pant and top pattern dated 1975.

Sizes:
Both dresses start at bust size 31 and up to 38 inches.
The other pattern starts at bust 31-40 for the top,
and the pants are 33-42 in the hips.

These of course are used patterns,
and I haven't checked to see if all the pieces are there,
but I know they come with the original instruction guides!


To Enter:
*Leave a comment below. 
I love to getting to know my readers, so let's do this, 
tell me where you are writing from...state/country!

*You must be a follower of this blog.
In the comments, also let me know how you are following,
via Blogger, Bloglovin', or e-mail. 

I will leave this giveaway open for 1 week,
with the winner to be drawn at random and announced next Saturday!

Thank you for reading Gladness of Heart
and for all of your wonderful support and much appreciated comments!

God bless and good luck!

Monday, February 24, 2014

Day 24: Guest Post with Diary of a MadMama!

Today, 
I am so pleased and excited to share with you one of my favorite bloggers!

I stay on top of all her posts, and look anxiously forward to each one!
Allow me to introduce to you, Jen from Diary of a MadMama!

Refashion Runway Competition: Week One Stripes | Diary of a MadMama


This t-shirt dress and the floral hi-low hem makeover below
 are just two (there are so many to choose from) of my favorite refashions from Jen...
can you tell I like dresses?


Jen

 I 'met' Jen through the very first Refashion Runway Competition,
held by Beth at Renegade Seamstress, and immediately singled her out as my favorite!
I've been following her ever since.

I love her sense of humor and creativity!
She does some of the most unique and 'out of the box' refashions I've ever seen.

I hope you enjoy her as much as I do!

~~~~~

Hello there!

Jen here, from Diary of a MadMama.

I am so honored that Desarae would so kindly ask me to be a guest blogger!
I have been blogging for a little over a year, and I've really enjoyed the journey so far!

Recently I refashioned the sleeves of these sweaters into fingerless gloves:

 Meh
Meh


Since all I used were the sleeves (and not even all of the sleeves), I still had a lot of sweater leftover.

Not wanting anything to go to waste, I thought of the perfect way to use up the leftovers...
A WINTER MAXI SKIRT!

I love the comfy-coziness of maxi skirts, and I HATE being cold
(especially this winter in Michigan, with arguably the worst winter weather I have ever experienced).
A maxi skirt made out of sweaters = warmth and style!

As a side note, I purchased the grey and red sweaters for 49-cents each at my local thrift store,
which fits my weekly "49-Cent Friday" blog series (the black sweater was given to me for free!).

The grey and red sweaters have strands of sparkly silver threads woven into them,
giving them a shimmery effect.

The black and grey sweaters are very stretchy, making them perfect for this skirt.
I mean, if the sweaters aren't stretchy enough, I'd end up walking like a geisha!

Since the red sweater had a higher wool content, it wasn't as stretchy,
so I decided to use it as the waistband (and top section) of the maxi skirt,
keeping the other (more stretchy) sweater pieces as the bottom of the skirt.

So to begin, I cut the sweaters across at the armpits like so:

Winter Maxi Skirt Refashion Tutorial | Diary of a MadMama
Snip!


Winter Maxi Skirt Refashion Tutorial | Diary of a MadMama
Snip!!


With the red sweater, I trimmed higher above the armpits to give myself more material, since I was using it as the upper, waist portion of the skirt.

Winter Maxi Skirt Refashion Tutorial | Diary of a MadMama
Snip!


I just trimmed down the sides a bit to make it smoother.

Winter Maxi Skirt Refashion Tutorial | Diary of a MadMama
Snip!


Using the brand-new serger I got for Christmas, I serged around the top of the red sweater...

Winter Maxi Skirt Refashion Tutorial | Diary of a MadMama
Pretty stitches 'eh?

...and then trimmed the ribbed waistband off of the black sweater:

Winter Maxi Skirt Refashion Tutorial | Diary of a MadMama
Snip!

After that was trimmed off, I placed the black sweater into the red sweater (wrong-sides together):

Winter Maxi Skirt Refashion Tutorial | Diary of a MadMama

And serged them together...

Winter Maxi Skirt Refashion Tutorial | Diary of a MadMama
Whirrrr...


Then I placed the grey sweater into the black sweater (once again, wrong-sides together):

Winter Maxi Skirt Refashion Tutorial | Diary of a MadMama

Once I serged that together, it was all done! And since I left the ribbed band on the grey sweater, the bottom was already finished.

Winter Maxi Skirt Refashion Tutorial | Diary of a MadMama

I love that the red sweater already is snug, which means I didn't need to add elastic.

This skirt is super comfy and I love it dressed up with my wide, black belt:

Winter Maxi Skirt Refashion Tutorial | Diary of a MadMama

By the way, what do you think of my slippers? ;)

Winter Maxi Skirt Refashion Tutorial | Diary of a MadMama

Winter Maxi Skirt Refashion Tutorial | Diary of a MadMama

I hope you like this quick and easy refashion.
Thanks so much for having me, Desarae! :)

~Jen


~~~~
I'm linking up at Anchored in Love Divine
for the Blog Everyday in February Challenge!

Saturday, February 1, 2014

January & December, A Month In Review

If you were one of those people who noticed that 'A Month in Review for December' post
was completely nonexistent,well, this should make you feel better.

Honestly,
there has and there hasn't been a lot happening in the last couple months.
Most of what has been happening isn't something you can sum up with a photo and caption.
Most of what has been happening has just been...life.
Some of that life has been new things coming alive inside of me,
and old things being resurrected...internal happenings, really.

There are however a few things I can share with you!
Like my 'new' sewing machine, for instance!
'New' actually means 'it-cost-$50-at-Goodwill'. :)


I give you the Singer Stylist 533!


Truth be told,
this little machine has been a resident in my home since the beginning of November.
So are you just hearing about it now?
For one, there were some repairs that needed attendance.
It was in sort-of-working condition when we got it- but it had been sitting so long that one of the plastic cogs broke as soon as we started tinkering with it.
It wasn't until late December that it was up and running!


It is really nice to have a back up machine, 
and this little dear has a special feature that I'm so pleased with!
You can remove a section of the base so it becomes narrow enough to slip a sleeve or pant leg over it!
It makes mending knee holes a hundred times easier!

This is the first singer I have worked with,
so it takes a little getting used to since controls and dials are different from what I learned on.
This machine also has a drop in bobbin, which was a little strange for me.


And guess what I got for Christmas!
My very own dress form!


 I'm pretty excited about it!
There are several dials, so I can adjust it to my (or any other) specific measurements. 
I haven't really had a chance to use it yet, but I'm sure I'll really enjoy it.
There have been a couple times in my refashion endeavours that I heartily wished for one of these!
You are sure to see more of this red beauty in my future refashion projects.

There came to be another new addition to my sewing room in December as well,
but since it was a project, I'll save that for another post.

Happy February everyone!

Monday, January 20, 2014

January Refashion Month Post


Today I'm sharing some of my hard earned refashion wisdom over to House of Estrela.
So head on over to read my post, Refashioning For Beginners!
 And while you are there, have a look around at the rest of the
wonderful posts being shared through this month's refashion series!

Saturday, January 18, 2014

DIY Crochet Hook Clutch

I crochet.
Didn't know that?
Well, I haven't showcased many of my projects yet on this blog,
but I have been crocheting since about 10 years of age,
and have crafted a myriad of projects.

I have my mother to thank for teaching me the craft,
and this Christmas I wanted to give something back to her,
which is why I decided to sew her a clutch case for her various crochet hooks!
This was one of the projects I was really excited about making,
but couldn't share with you back in November.

Through, where else, but Pinterest,
I found this wonderful tutorial from  Little Birdie Secrets.
All the measurements are there for you,
even a breakdown of pocket spacing for each hook size.

My Changes:
-I did make my pocket size for G and H a mite smaller,
going just under 1/2 inch.

-I made my clutch a tri-fold.
 I liked the size better and felt it helped to cocoon the hooks in more securely.
This does affect the placement of the button,
so bear that in mind when considering which version you want to make.


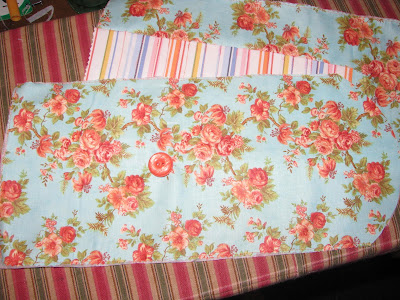
I used leftovers fabric from this project and a multi-colored striped shirt in my refashion pile
to craft my version of this hook case.


See those lovely colors?
I knew this would partner well with the coral and robin's -egg- blue of this gorgeous floral print.
It lends a bit of whimsicality, don't you think?


The stripped fabric became the sheaths for the hooks.
Following along with the instructions,
it came together very nicely.


You can see here that my button placement is different than the original.
Just fold your case over as many times as you would like, in this 'case' (sorry), 
I folded mine over twice, then the rounded part folds downward. 
How you fold it will determine where the button and closure fall.


Doesn't this button match perfectly?!
Would you believe it was the original button from the huge coral blazer I refashioned?


It is hard to tell in this picture,
but it just so happened that many of the lines I stitched to create
the hook pockets correlated with the pattern stripes!
At any rate, they made excellent guides for a straight stitch.


Here it is all finished!

The biggest problem I had?
Sewing this darling up without mom knowing!
My sewing area is in the middle of the house, a high traffic area,
so there is no hiding what you are making...unless..yes...that was it!
I would make it in one morning while mom was away at Bible study!!
It was perfect...she would never know...I'd clean up every trace of evidence...
there wouldn't be a single thread on the floor...the perfect crime surprise...mwahaha!!!

No joke. 
That's just how I felt.
Like some mad scientist whipping up an end of the world concoction in his lab,
I was giddy with delight that I pulled it off, a complete and utter surprise!
"I've done it!! I've created a masterpiece!"


It still gives me thrills just thinking about it.

And she was...
completely surprised.

Saturday, January 11, 2014

DIY Basic Boy's Wallet

Remember when I shared with you

Well, today I will share with you my version of the 
Basic Boy's Wallet.

As soon as I stumbled upon this clear, easy to replicate tutorial from Noodlehead
I knew I needed to create my own version as a gift for my baby brother.


For my wallet,
 I used a scrap piece of denim from a refashion project,
and cut the remaining pieces from a plaid shirt.


 Ahh, look at those lines, all matching...*sigh*...it does my OCD good.
Oh, um, moving on...
Using the basic tutorial instructions,
I folded and pinned the card pockets.
Before sewing these up, 
I inserted a card, testing the depth of each pocket,
to insure I had them right.


In place of leather accents, as used in the tutorial,
I opted for a simpler version.
Snipping a blue 'J' out of a piece of felt really personalized this wallet, 
perfect for the six-year old stage of life where ownership is key.
Not to mention blue is my little brother's favorite color.


Stitching around the outside edges,
I had my initial secured lickety-split.

The rest was fairly simple,
I sewed up the edges, turned the whole thing inside out
and finished with some top stitching!


I will admit though, the edges of all my pieces weren't perfectly aligned, 
which caused some frustrations...
but nothing some trimming and increased seam allowances didn't fix.


And just like that I had created a cute little wallet.
Throw a couple of $1 bills in there, and it was a hit with the little man!

If I were to change to a few things,
I would certainly have used a webbing on the plaid pieces inside,
the material is very soft and thus a bit floppy.
Alas, I didn't have any on hand and needed to get this finished.

Also,as an afterthought, 
it dawned on me that a six year old really hasn't much use
for the card pockets but would much more have benefited
from sort of zippered or pocketed compartment for change!

Oh well, he loved it, and that is all that matters in the end!

Thursday, January 2, 2014

January Refashion Month Blogging Party!

https://blogger.googleusercontent.com/img/b/R29vZ2xl/AVvXsEgm0vywwwwrNnNZLKtzRBv760qIwUD8FZNulVgElfr8PfrfouRv7fbbeGIjnBDYBlksNaQRYV8WnegygdmJAc0w1tojmUArv7QEbkaa0woPdkSg4tU_yrIDyMo-c9t_CODhoSjaNMWg274/s1600/button.jpg 

 Happy New Year everyone!
The beginning of a new year is one of my favorite times.
A time to wipe the slate clean, start afresh and separate yourself 
from anything in the previous year that would hold you down.

And, as person who exhibits OCD traits, 
I'm am so excited that we are now in an even numbered year! 
Yay! I can breathe easier now.

Having established all this,
I would like to share with you a fun way to get the year started off
on the right foot...and what better foot than the one on your sewing machine!

Some of you may remember Magda who blogs at House of Estrela
from Season Two of Refashion Runway.
 Well, Magda is hosting a month long refashion party of sorts,
with guest posts the blogworld over bringing you their best refashions,
tutorials, and how to's!

This is such a fun way to bring together a community of 
talented ladies and bloggers!
I am excited to be part of this month's line up
and look forward to checking in day to see what the rest of the ladies
bring to the sharing table!
I hope you will check it out and follow along too!
Follow this link to see the very first post of January Refashion Month.

Monday, December 30, 2013

Top 5 of 2013
Hits

 Hello my dear faithful-even-when-I-don't-post-for-a-month followers!

I don't know about you, but this past month was so busy
 that blog posts were the last thing I was worried about. 
I'll admit, I did worry about it a wee bit, but hey, the reality is I have a life, you have a life, 
and that life won't end if I don't post anything on my little blog.

Aside from being busy completing a large order of my mermaid crochet dolls, 
making some (though sadly not all) of these DIY Christmas gifts,
 I also dealt with an illness immediately following Thanksgiving 
that could have landed me in the hospital. 
I still have a few issues that I need to deal with, 
but I was able to get my body back up to relative health.

Anyway...
As things have settled down a bit,
I have been doing some catching up on my blog reading, another thing that didn't happen over the holidays, and I have been seeing the Top 5 of 2013 posts at several blogs I frequent.
It sounds like a fun idea, so I thought I would hop on the last passing wagon!

Here is my list for...

 Top 5 of 2013: Hits


http://crafting-a-rainbow.tumblr.com/post/70085318438/join-me-in-posting-your-top-5-lists-for-2013


5. Minty Teal Shirt Refashion


This was a pretty easy refashion, more of a fitting job, really, than an overhaul.
But with a few little fitting tweaks and by taking off the collar,
I completely changed the fit and style of this shirt.
It quickly became one of my favorite wardrobe pieces!

4. Bubble Hem Denim Maxi Skirt Refashion


Again,
this was a pretty simple refashion.
By combining a too-small pair of jeans and a hardly-worn skirt,
I created a fun maxi skirt that I absolutely fell in love with.
All of the extra width of the skirt was gathered at the front by using a box pleat,
and this created a flowing, draped effect at the front of the skirt.
This was in strong rotation during the warmer months of summer,
and I can't wait to pull it out next season!


3. Peplum Jacket Refashion


Those of you who followed me
during the Refashion Runway challenges will remember this jacket.
 I am super proud of how it turned out, and I love all of the little details...
lightly puffed sleeves, pin tucked seams in front and back, extra buttons
and lovely metallic and burgundy thread stitching detail.
Plus, as a budding seamstress, this held many firsts, including drafting
my own peplum pattern.


2. Medieval Costume


My first real refashion challenge this past year
came when one my younger brothers needed a medieval costume
as part of his camp counselor outfit for their weekly medieval banquet.
After a thrifting trip, we came up with just the right pieces
and I was able to make a shirt, vest, cape, hat, leg wraps,
 and even the cape clasp from thrifted items!
His outfit was a hit and I was more than thrilled with the final results.


And now, for my most favorite refashion and sewing project from this year...
I give you ...

1. The Jane Costume 


Also another project from the Refashion Runway Season 2,
this is for certain my crowning achievement of 2013!
In the midst of this project, I was under pressure and a bit stressed,
but looking back, I had lots of fun putting together the details and seeing things take shape.
The best part of course was seeing the finished costume and dressing up for a fun photo shoot.


And there you have it,
my top five hits from this past year!

When I take into account that I haven't yet been sewing for a complete year,
I am so excited and pleased to look back and track my progress.
I can't wait to see what this coming year has in store!

I would like to thank Gillian over at Crafting a Rainbow
for coming up this great year end review idea!
Related Posts Plugin for WordPress, Blogger...