
I have a confession to make.
No, I lied.
I have two.
Confession number 1) I don't celebrate Halloween.
I know, I know, that may seem a little strange,
but only as strange as celebrating death and fear seems to me.
This means that I've never had a Halloween costume before.
Which leads to Confession number 2) I love Disney. Seriously, I do.
Now, how this love was able to co-exist without the usual expression
of the yearly Halloween dress up, is a feet to be marveled at.
So it should come as no surprise that my Halloween project for Refashion Runway
was a costume inspired by Jane's dress in Disney's 'Tarzan'.

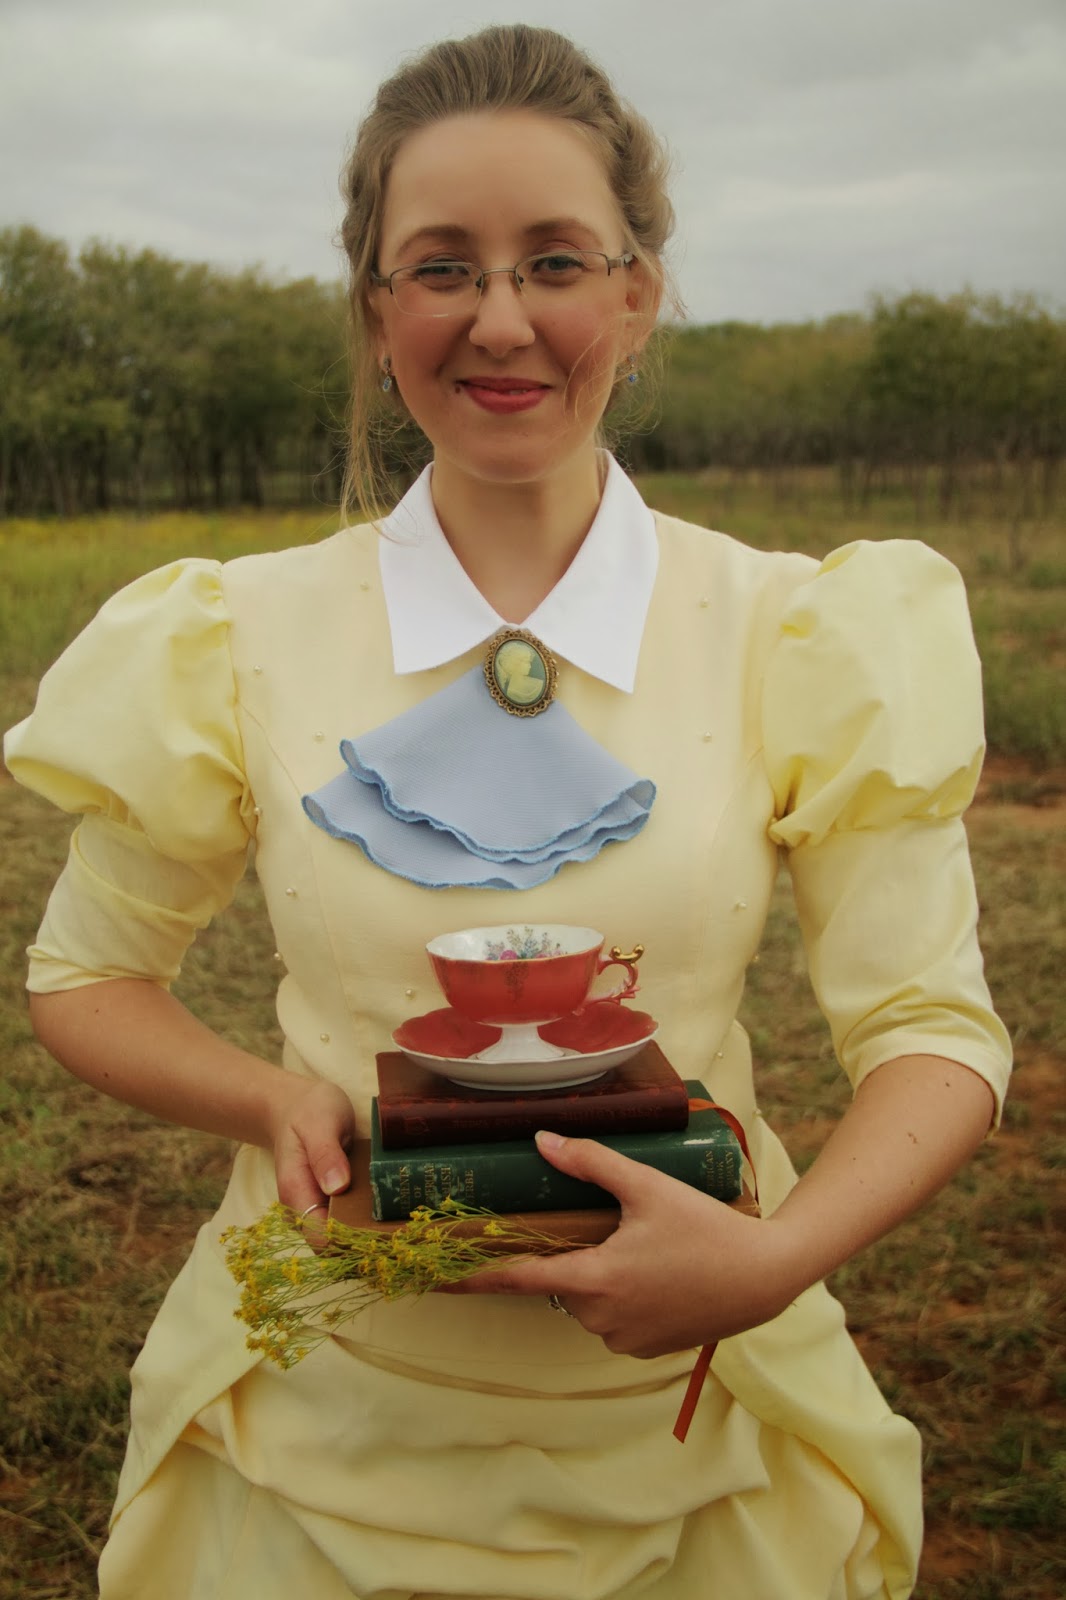
I give you exhibit A.
I love Jane.
She is bundle of bumbling brilliance and understated beauty.
I feel just like her most of the time.
I love Jane.
She is bundle of bumbling brilliance and understated beauty.
I feel just like her most of the time.

I had my work cut out for me if I was going to pull this off!
I started out with a fake layered two piece yellow dress suit,
a white button up shirt, and an old yellow sheet and lace trimmed circular blue tablecloth.
In the 'before' picture, you will also notice a yellow button up shirt-
I actually didn't end up using this, as I had plenty to work with otherwise.

To start things off, I separated the top from the skirt of my dress suit...

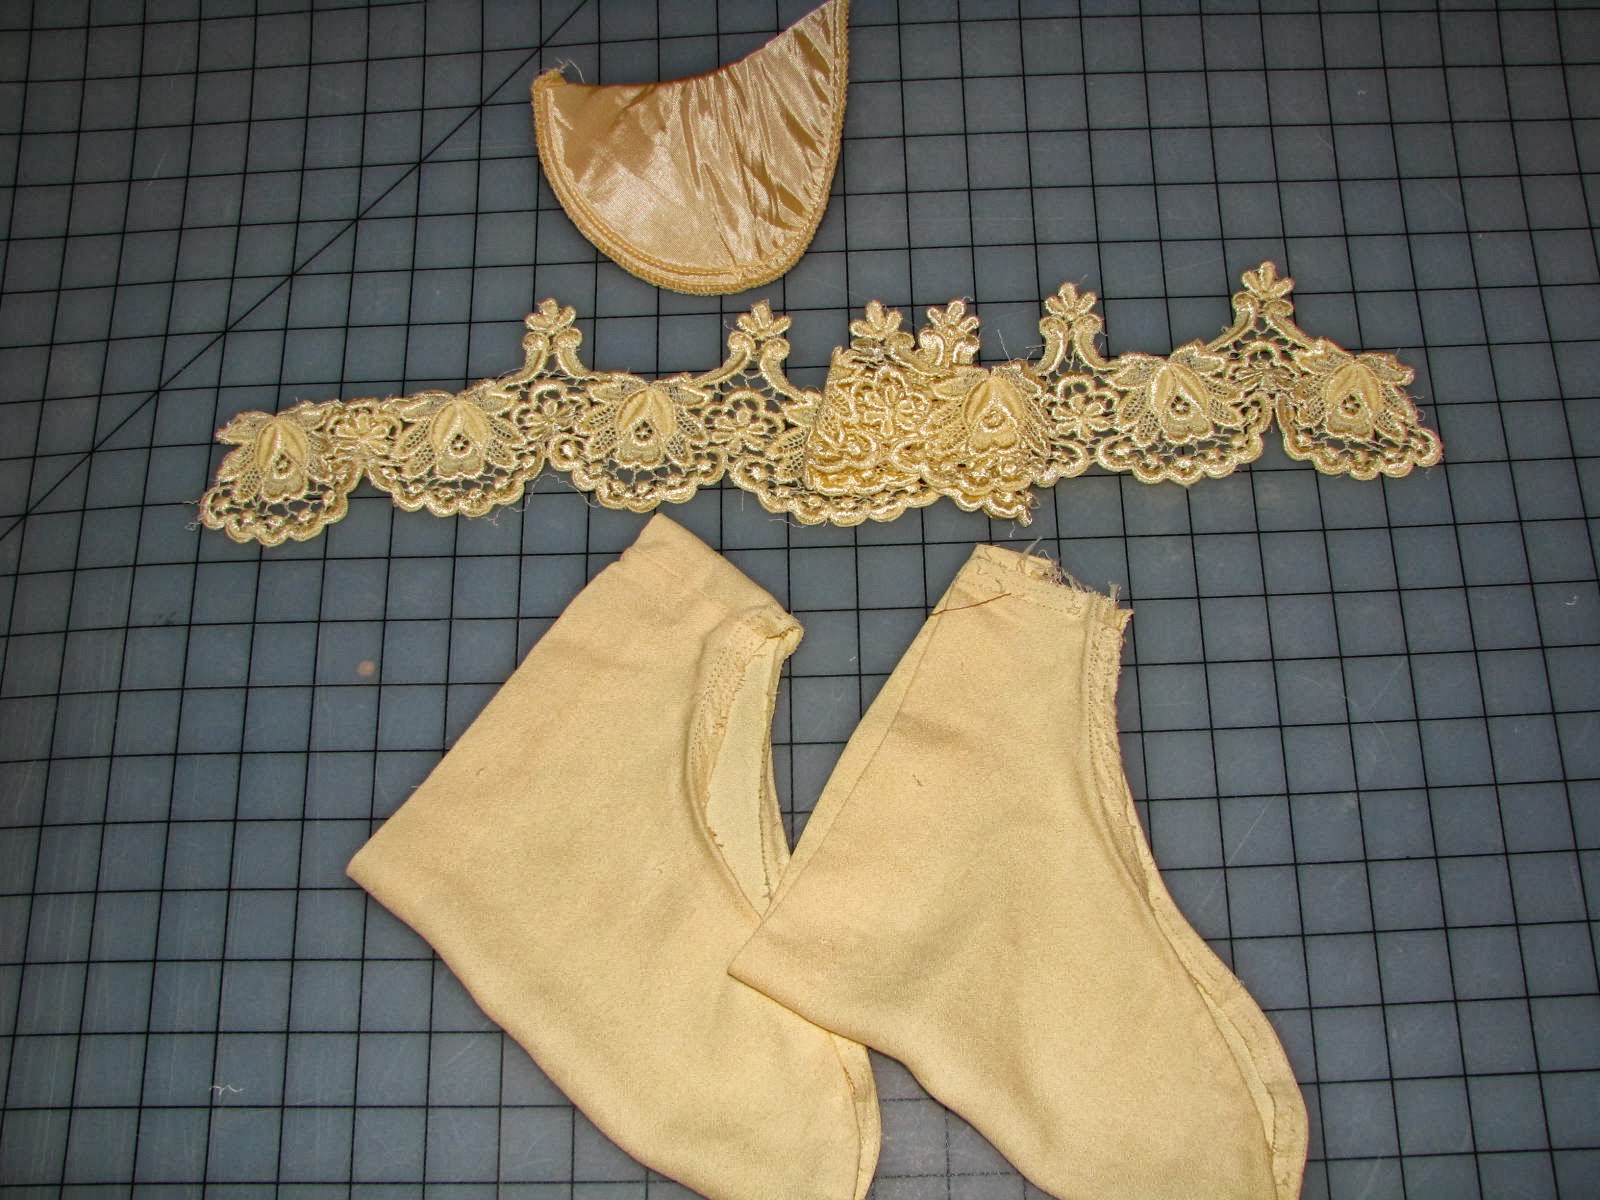
...and removed the shoulder pads, lace and sleeves.
I wanted to take off all of those little pearl buttons,
but they were punched through and very well secured,
there was no removing them without leaving holes!
And thus they stayed.
And thus they stayed.

I shortened the zipper in the back of my top and hand sewed a new stop.
I also tacked the lining back down by hand.


To add some extra flair in the back to accommodate for the bustle,
I added a couple of small pin tuck/darts on the seams at either side of the zipper.

In order to create the Juliet sleeves (as I learned they are called) on Jane's dress,
I drafted a pattern using this tutorial/method.

First I traced the original sleeves...


Then cut it into 1 inch strips, and spread them 1 inch apart
on top of a new piece of tissue paper.

After adding an extra inch on the top and bottom, I had my puffed sleeve pattern.
I made two, just in case one met an unintentional demise, which would be terrible after all that work.
It was a simple enough process, but pretty time consuming.
It was a simple enough process, but pretty time consuming.

I laid my new pattern out on the yellow sheet...

...and cut.
After sewing the sleeve together, I gathered the top and bottom.
Next, I took some measurements for the bottom straight part of the sleeve.
I started with a simple rectangle, which I eventually tapered towards the elbow.

Pin it to the puffed sleeve...

...and sew.

For the cuff, I cut off the existing cuff from the old sleeve, with worked perfectly!
Another reason for doing this was for a uniform look.
The yellow hue of the sheet from which I cut the sleeves
was slightly different than that of the yellow shirt.
So by making the cuff out of the old yellow shirt sleeves,
I feel it tied the colors together nicely.


I sewed it over the raw edge of the sleeve just like you would sew on bias tape.

Now I could attach the sleeves to my shirt.
After that, I moved onto making my new skirt.

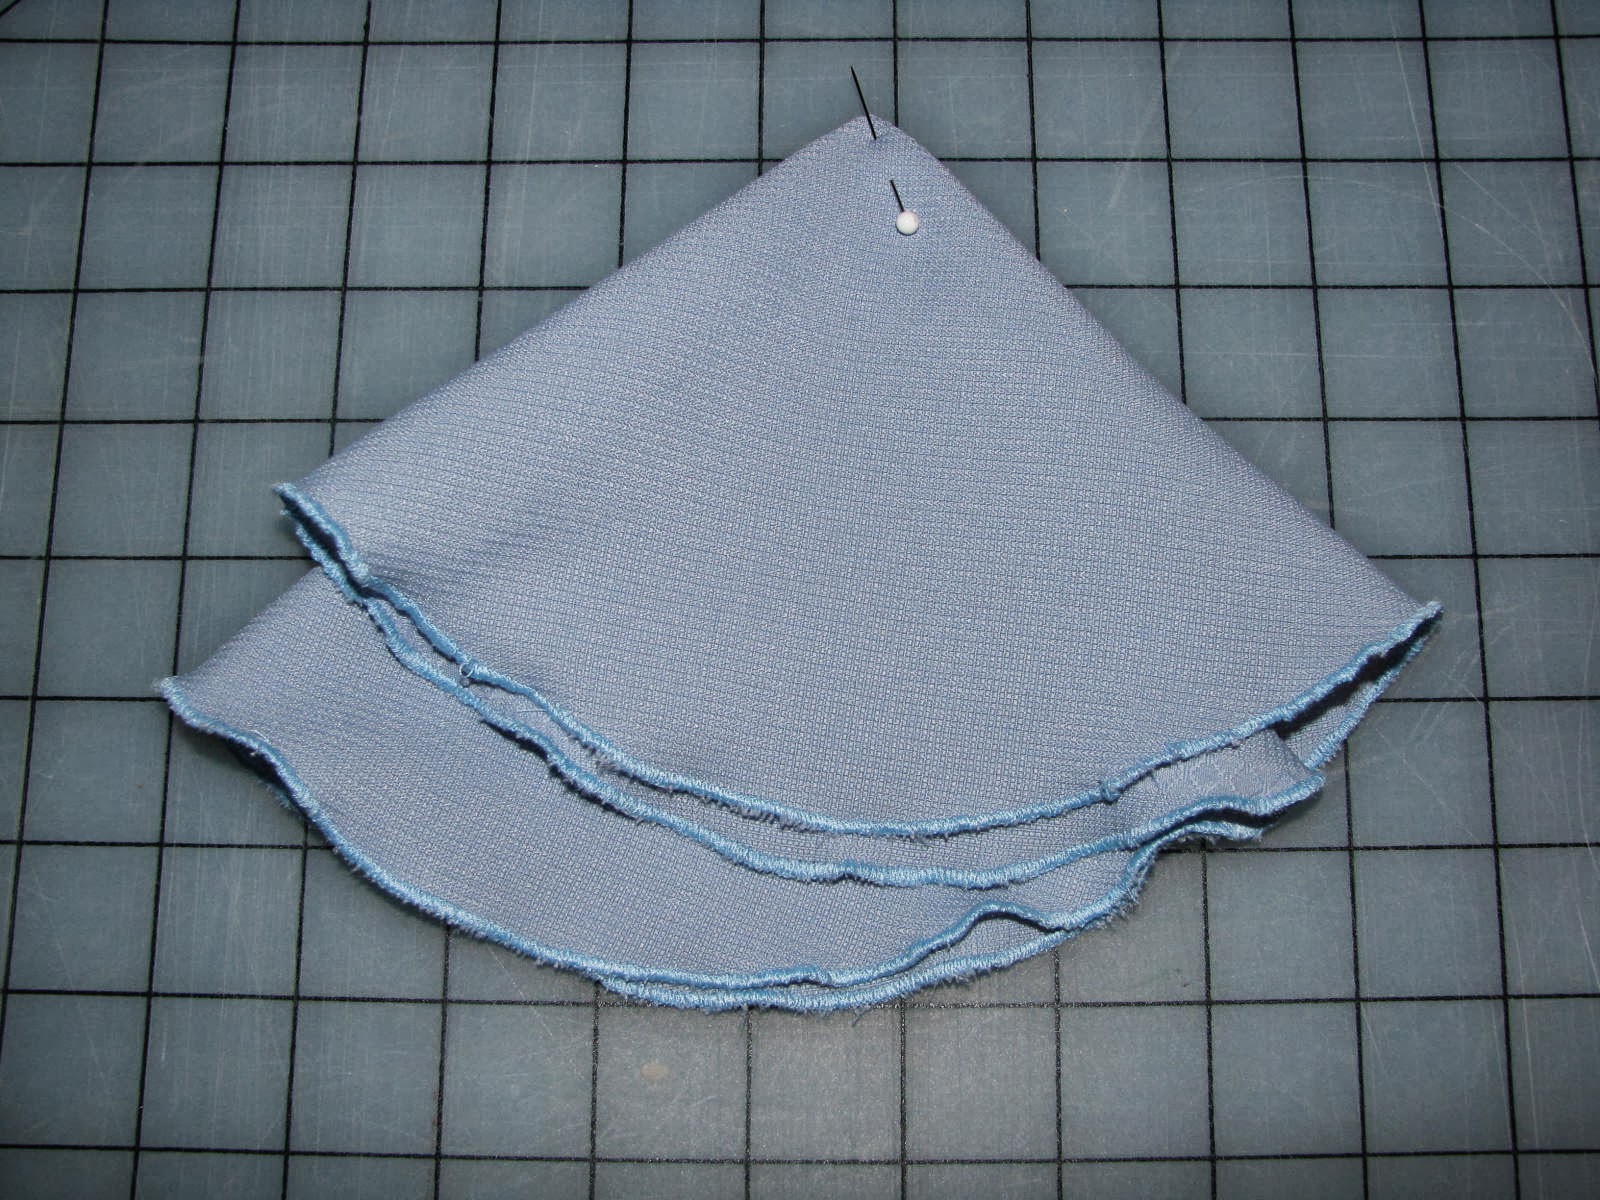
Taking the blue circular tablecloth, I folded it half, then half again.

I used this chart to determine the radius I needed to cut to create the hole for my waist.
After marking it down, I cut it out then added a zipper.
Now I had a flowing circle skirt!

Returning to the skirt portion of the yellow dress,
I ripped out the back seam so I had one long rectangle.

I first hemmed up all of the raw edges, except for the top which would be attached
to the skirt and covered with a waist band.
After doing plenty of research, I based my method for creating the back bustle off of
this video tutorial and a couple of other pictures I found.
this video tutorial and a couple of other pictures I found.

I sewed lengths of grosgrain ribbon to the top (waist) of my material,
then pinched and pinned up sections of the fabric.


This is what is looked like on the other (right) side.
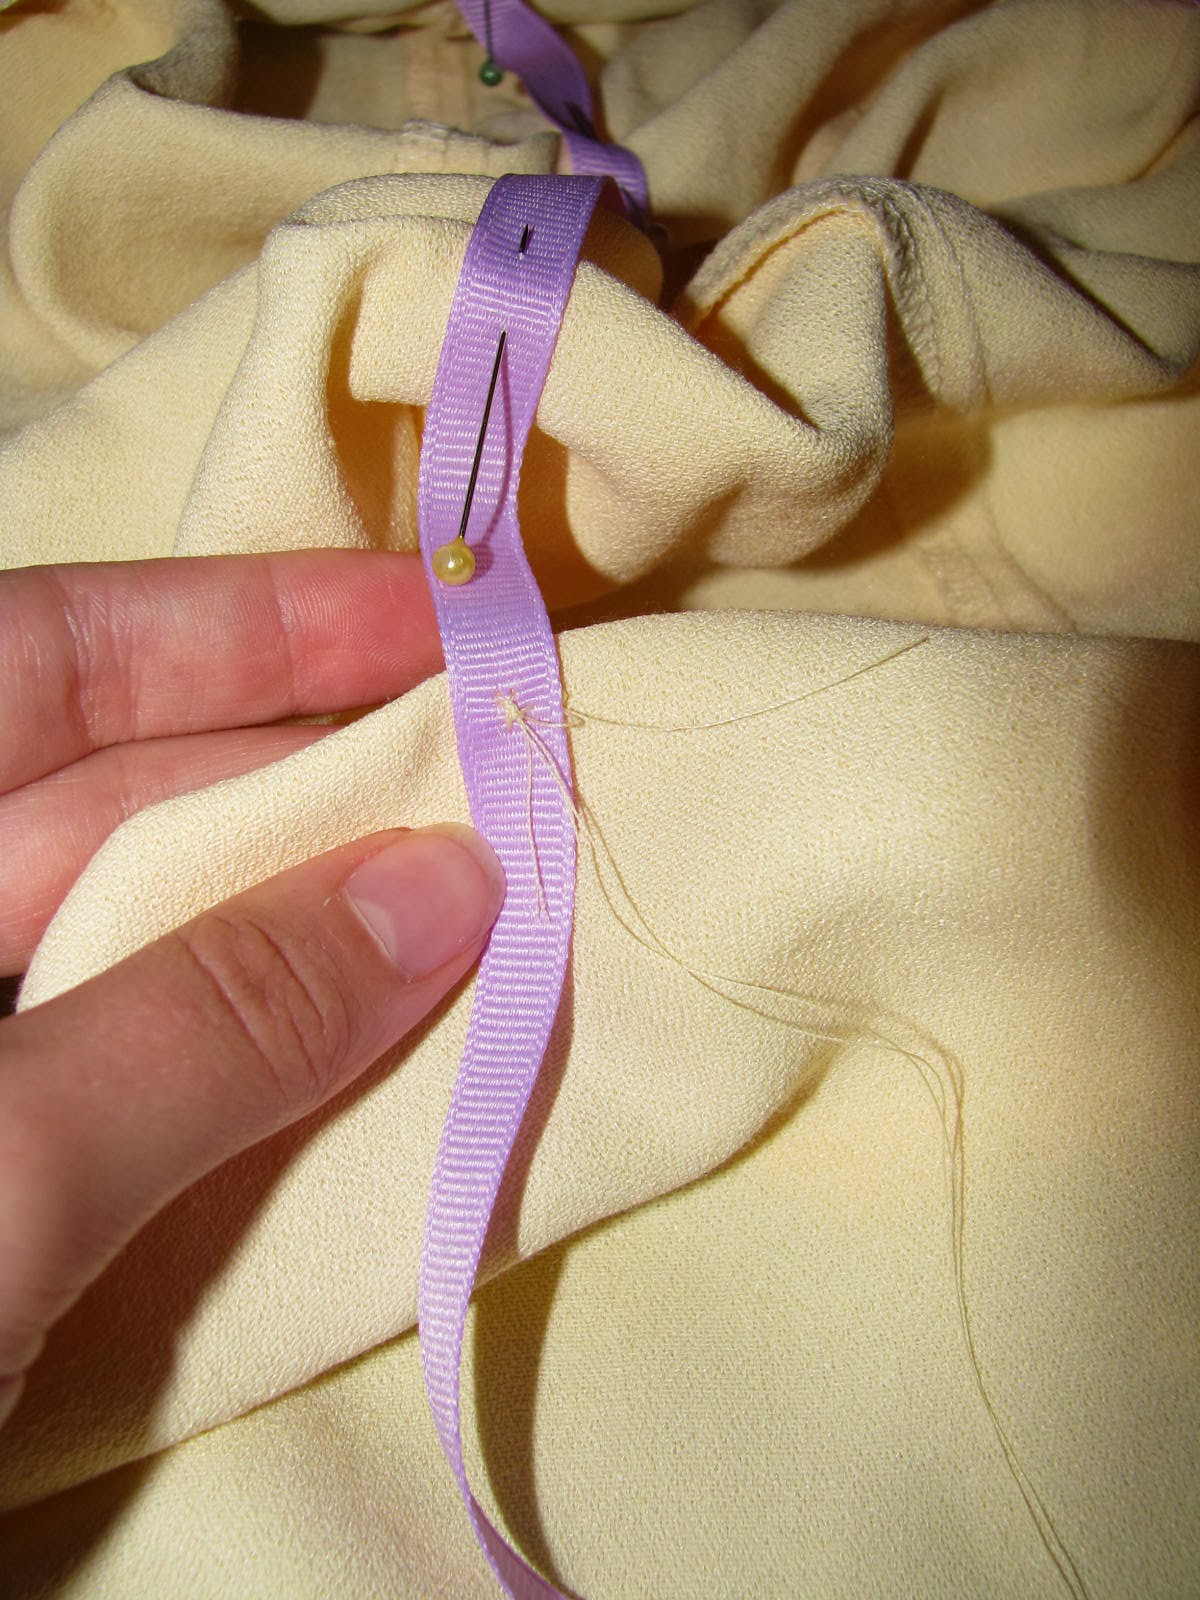
Once I was finally pleased with how it looked,
I sewed the pinched gathers to the ribbon by hand.
That took a while!

I also measured out, pinned and sewed upward facing pleats on either end,
to accomplish a rounded look.
to accomplish a rounded look.

Once that was all sewn in place,
I basted my front swoop to my blue under skirt.

At this point, I needed to take care of some extra girth in my skirt...it was literally falling down!
I hadn't wanted to cut out a big chunk of fabric when I installed the zipper,
so I came up with a different way to take care of it.
I measured how much needed to be taken in on either side of the zipper
and marked those points with pins.
and marked those points with pins.

Then I folded those points over towards the zipper, creating a sort of pleat,
and sewed them down.

This was a great fix for this sort of project because it created
lots of extra fullness in the back, which is just what this style called for.

Moving right along, though I wasn't home free yet.
To create the back bustle,
I once again returned to my old sheet and cut a very long rectangle,
based on some loose measurements.

After hemming up the raw edges,
I followed the same process as above to create the bustle,
with a few little improvements and minus the pleats running up the sides.
I started with a large box pleat at the top center of what would be the waist line,
and this created a beautiful end result, perfect for a full back bustle.


The top folded portion of the sheet was ideal for making the waist band of my skirt
and bustle. I cut right along the bottom of the ribbon trim and got a nice band of double thickness.

This I folded and ironed in half, pressing in the ends to hide the raw edges.

The main skirt...pinned...

..and finished.
Including an inside button for the overlapping band in the back.


Repeat for the bustle.

Now in order to attach the back bustle to the main skirt,
I needed to add buttons to the inside of the bustle waist band,
and cut button holes into the waist band of the main skirt.


Look at those beautiful button holes!!
I have to admit, I was pretty scared to do these...I have only ever sewn one...yes, one
little button hole with my machine.
After getting this deep into my project, I was terrified of ruining it.
But after about 30 practice runs, I was ready to do the real deal,
and I was so excited at how beautiful they turned out!
*Contented sigh*
Ok, moving on.

Here I have the crisp white, button up shirt.

That white collar was perfect for the Victorian look I was going for,
so I cut a dickey out from around the collar.

Then trimmed and hemmed it up all nice and neat.
Earlier, when I had cut out the waist opening in my tablecloth,
I was left with a perfect circle.

After satin stitching around the edges twice, I folded it into fourths,
and hand stitched the top point to keep it closed.
This became a neckerchief.
There was one final little item I needed to sew that would make a 'big' impact on my outfit.
In keeping with Victorian Era fashion, I made... for lack of a better term, a butt pillow!
Seriously, it is a pillow that rests on your rump with ribbon ties
attached at either side so you can tie it around your waist under your skirt.
This gives the back of the skirt that dramatic pouf!
I took some guesstimated measurements and whipped up this little guy using
material cut from the sheet and more grosgrain ribbon.

I included my hand in the picture for scale.
After all that, I was finally finished!!
I had a smashing costume...some assembly required.
Oh, and a little life hack.
I totally sprayed my puffed sleeves and bustle with heavy starch...and then blow dried them.
It worked!!
Oh, and a little life hack.
I totally sprayed my puffed sleeves and bustle with heavy starch...and then blow dried them.
It worked!!
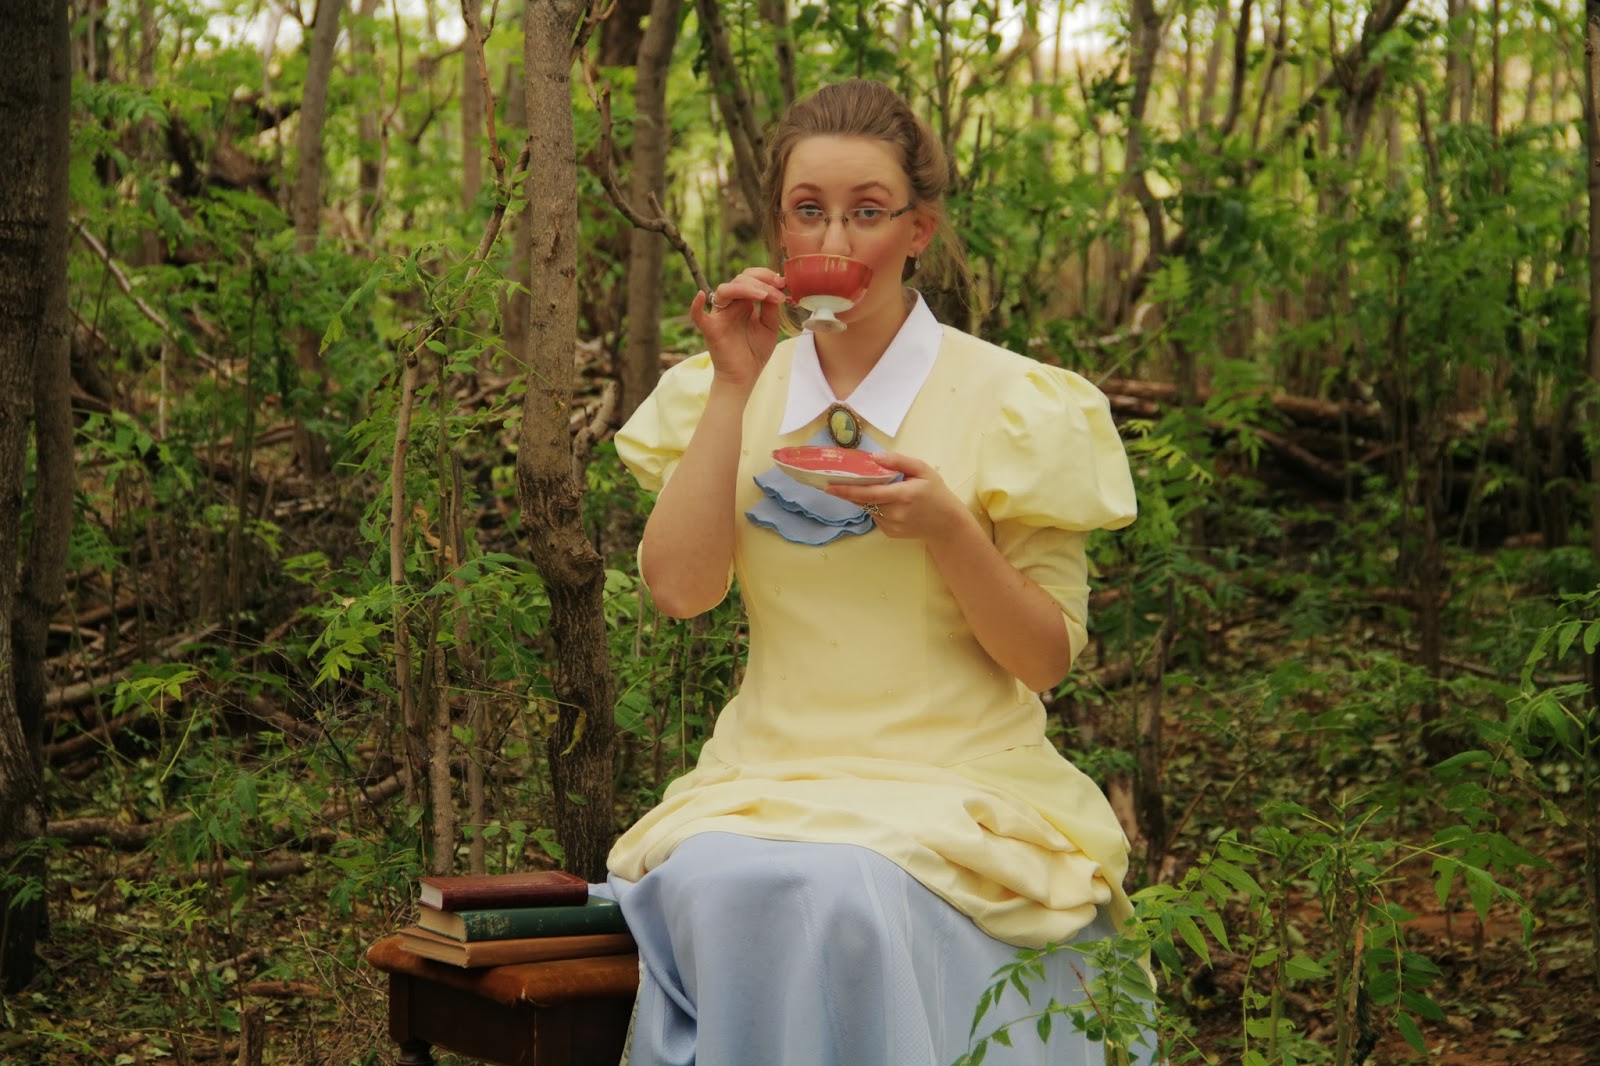
And oh my goodness! Did I ever have fun wearing this outfit and taking pictures!!
See for yourself.
.jpg)


Here I demonstrate how the bustle attaches with buttons.


Look at that bustle!
Ahh! Love it.


And, of course, my signature pose. :)
There are tons more pictures, most a little more role playing,
so I am going to make another post with those,
so check back later!
Now head on over to The Renegade Seamstress to see what the other
extremely talented ladies made for their costumes!
Remember to vote for your favorite!
Ta ta!
Wow, that is sooo cute! Great job!
ReplyDeleteThank you, Madison! So glad you stopped by! :)
DeleteOh my goodness!! Sweet girl, I am so proud of you! This is just awesome, and I love, LOVE the pictures!! Nana
ReplyDeleteI know, didn't Anthony do a wonderful job with the pictures!? I've been telling him he should become a photographer or at the least set up a site with some of his pictures. :) Thanks, Nana!!
DeleteOh my goodness! This is so very becoming on you, and a lot of work to get the finished dress. I am so impressed by your abilities! And once again, the photos are marvellous. You suit the character to a "T"!
ReplyDeleteWhy thank you!! Your comment made my day, Jenny, especially that last bit! :) Yes, it was a lot of work, thank you for noticing! To date, this is also my favorite photo shoot- I had way too much fun! :)
DeleteThis is wonderful!! Wow, you have amazing talent!
ReplyDeleteSo glad you liked it! Thank you!
DeleteWow! That was a lot of work and you are amazing. I just love your designs and your shots are really well done. I think you should send it into Disney. As I South Floridian you totally have her down in a great way! Thanks! Chris Bures
ReplyDeleteWow, that is quite a complement, if you think I should send it to Disney! Thank you. :) The dress is completely accurate with the character costume though- I tried to make a compromise between the inspiration and actual 1870's era dresses I researched. :) I'm glad you liked it!
DeleteThis is a very creative costume, Desarae! I love how you added the bustle and butt pillow. So cute! Also, your photos are gorgeous. You look beautiful!
ReplyDeleteThank you so much, Trish! I had so much fun wearing this costume, I didn't want to take it off. Although it was a bit difficult to sit in. I love your butterfly costume! You did a splendid job with it, especially after such a rough start!
DeleteDesarae, you are the most clever person ever!! I am absolutely in awe!!! I love your dress, it's so clever!
ReplyDeleteI'm blushing! Thank you, Jemimah! :) But really, I wouldn't have been able to do this without the great resources I was able to find online to show me how to accomplish what I wanted!
DeleteI have always loved Jane's yellow suit and you captured it wonderfully!!! The photo shoot is equally wonderful.
ReplyDeleteOh and I don't celebrate Death and Fear either, but we do celebrate "Halleluiah Night" with fun costumes at church on that particular night. :o)
www.dressupnotdown.blogspot.com
Thank you, JJ! (I check out your blog, it looks fun! I'll have to revisit it and give it a more thorough peruse once I'm finished with Refashion Runway and have more time!) Halleluiah Night is a great idea! Different churches I've been in just call it a Harvest party. We do fun stuff, but didn't dress up. I like that y'all still dress up! That is so much fun. Thanks for stopping by and commenting!
DeleteOh wow - that is gorgeous! You did such a great job. all the best with this round. I am glad you had the inspiration pic there 'cause I would have had to look it up. Your dress is even prettier with the blue skirt.
ReplyDeleteYes indeed, everyone pulled out the stops this week! Thank you, I liked the blue skirt too. It wasn't exactly spot on with the original, but I used what I could find! :)
DeleteDesarae, this is just beautiful! I love the bustle!
ReplyDeleteThank you, Carissa! It was a lot of fun making and wearing the bustle, so out of the realm of what one normally sews. I loved how we both made Disney inspired costumes!! I think I literally squealed when I saw your dress. :) Like I said, I'm a Disney geek.
DeleteGreat job Desarae, it turned out beautiful! And, I love, love, love, the styling of your photos...perfect!
ReplyDeleteThank you, Susan! We had a ball taking these pictures, and we were able to take them in our own back yard...sort of. It was actually out in our pasture, so I guess it was just waayyy back. :)
DeleteNo way!!!!!!!!!!!!!!!!!!!!!!!!!! I LOVE LOVE LOVE LOVe this.
ReplyDeleteThis is the best post of you that I ever read. Pictures and especially the sewing. Oh man! It will take so much price if you can sell it. Well, I dont celebrate also the Halloween :)
I just cant wait for my sewing course.
Thanks for Sharing Des.
Blessing,
Delvalina
Delvalina!!! I have missed you! :) Thank you friend!! Your enthusiasm and encouragement makes me smile all the way to my heart! I'm so glad you loved it! I can't wait for you to start sewing, either!! It will be so fun to see what wonderful things you make. :)
DeleteWhen the time comes, I can't wait to see the wedding dress that you will sew for yourself, I'm certain that it will be absolutely stunning!
ReplyDeleteWow...there is a thought!! I had never even considered that before. Hmmm, thanks for putting a little bug in my ear and for the vote of confidence, Christy! :)
DeleteYou are very clever and have quite an eye for detail and design. I am impressed.
ReplyDeleteThank you, Suze. I still feel so very new at this, but I love it and have learned to pay much more attention to how clothes are made and what makes them beautiful!
DeleteHi There! I've enjoyed your blog, I came from the Tasmanian Minimalist's shout-out. : ) I'm a Texas gal myself...I have four daughters ages 19 to 30 at home too. : ) My 19 year old is home today and really enjoyed your blog as well.
ReplyDeleteYou look like quite the seamstress, oh my! Love your ideas and the settings for your photos.
Blessings! ~Amelia
Hi, Amelia! Wow, how exciting to get a shout-out! Thanks for coming over! I'm glad you enjoyed my blog! Bravo for your girls, I know how hard it can be in this society to still be at home after college age, but I think the road lesser traveled it often the best. Thank you, but I don't feel talented enough yet to be called a 'seamstress'! LoL- I just like sewing and I'm trying to get better with each project. :)
DeleteThis is so amazing Desarae... I didn't get the chance to read it all before and I was tired just by reading all you had to do to create this this costume. But it looks amazing congratulations.
ReplyDeleteThank you, Magda!! :) I know, my posts get pretty lengthy when I go into detail- maybe I should work on shortening them up?
DeleteOh I meant I was tired just to know about all the work you had, not of reading it all... hehehe... I love those long and detailed posts! Please keep them!
DeleteOh good! I'll keep them that way then- I like to write my posts the way I like to read other people's-- getting all the details of how they made something. It really makes you appreciate their work more, and you learn a lot from watching other people create! :)
DeleteOh Desarae, I just L.O.V.E your dress! It is simply gorgeous (...not to mention yourself ; ). As always, you did a spectacular job!
ReplyDeleteLove you
Blessings - ~ Aspen
:D I love you too, Aspen!! Thank you so much!! It was so fun making a costume, I think I am definitely going to do some more work this this in the future...like say, helping you with your costumes! :)
DeleteHere from Better After.... wow!! You did a fabulous job on it... such talent. :)
ReplyDeleteHi, Reenie! I'm always excited to hear from new people, thanks for stopping by and thank you for your compliments. :)
DeleteWow! You did such a fabulous job! At first I was skeptical you could pull it off, but you did and you look fabulous! And by the way I don't celebrate halloween either. I just like to dress up and that holiday is the perfect excuse.
ReplyDelete-Callie
Indeed, it is a great excuse to dress up! Thank you, Callie! I'm glad I was able to transform both this outfit and your skepticism! :)
DeleteThis comment has been removed by a blog administrator.
ReplyDeleteOoh! I LOVE it!!! Just poking around the blog after a stint of absence :) And, if someone didn't mention, the "butt pillow" you crafted is actually a historically correct garment to wear and it's proper term is "bum rump" LOL Great job! Though I'm not a huge fan of the Tarzan film, I always love Jane Porter :D
ReplyDeleteOh, thank you so much for filling me in on the correct name! I knew it was an actual historical garment, I looked that up and saw how to make one- but I never got the official name! Thanks for solving that mystery for me. And thanks for 'poking around' some of the older posts!
DeleteThis is *adorable,* and I love how creatively you upcycled all your materials, and made an interpretation of the costume rather than obsessing over making it look just like the cartoon. I am trolling the interwebs looking for inspiration and ideas for my own Jane costume, and I LVOE this!
ReplyDeleteum, LOVE. gah
DeleteHi, Desarae. I have to have a Jane Porter costume for somthing at my school by the second of october (i know.. Short notice!) and i was wondering if you would be willing to sell the dress so a decent price? my email is kleeholl@gmail.com thank you
ReplyDeleteWOW! You did an excellent job! I'm a Disney addict as well nor do I celebrate Halloween! Completely on the same page! You're post will definitely help me, (I've been brainstorming on how to create Jane's dress for quite some time now). I love your personal touch to the dress too!
ReplyDeleteThanks a Billion for this post!!!!!!!!!!!!!
Autumn