Have you ever Googled a color?
Only twice in my life, have I ever.
Once for a bride's maid dress,
and the second to find out what in the world 'Pantone 2013 Emerald Green' was!
Green and I don't get along well together,
so I was very relieved to see that this particular green was more of a teal-green,
as compared to the St. Patrick's Day green I had in mind.
And to my further surprise, it wasn't as hard to come by as I thought it might be.
Still, it amazed me how challenging this project was...probably on the count
that green doesn't naturally conjure up my inspiration.
None the less, after lots...and lots...and lots of brainstorming and reworking,
I came up with a lacy maxi skirt, made from a dress, shirt and an old curtain!
I started with the dress first, which was a wee too snug all around.
The skirt and bodice were two separate pieces, so there was no chopping involved...just lots of ripping.
Once that was done, I took some measurements for my waist,
then measured and marked accordingly on the bottom portion of the dress bodice.
After chopping it off, I folded the raw edges together, right side out,
and sewed it up.
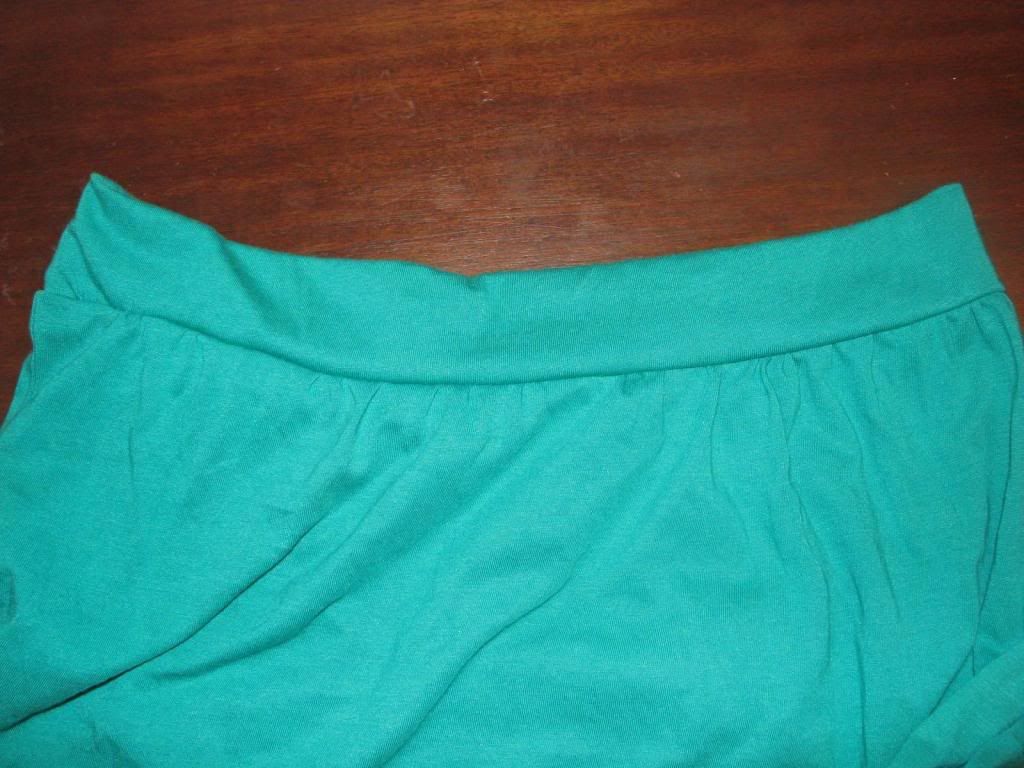
Then I pinned the band to the raw edge of the bottom part of the dress.
This is what is looked like.
Now I had a skirt...albeit a rather, short and plain one.
Not to worry,
I'm not finished with it yet!
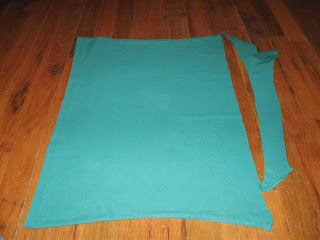
Moving on, I delimbed my green shirt and chopped off the upper half,
right were the arm hole starts.
right were the arm hole starts.
Once that was all chopped up, I was left with this piece...perfect for the bottom tier of my maxi skirt.
But before I attached that to the other skirt piece, I had something else in store.
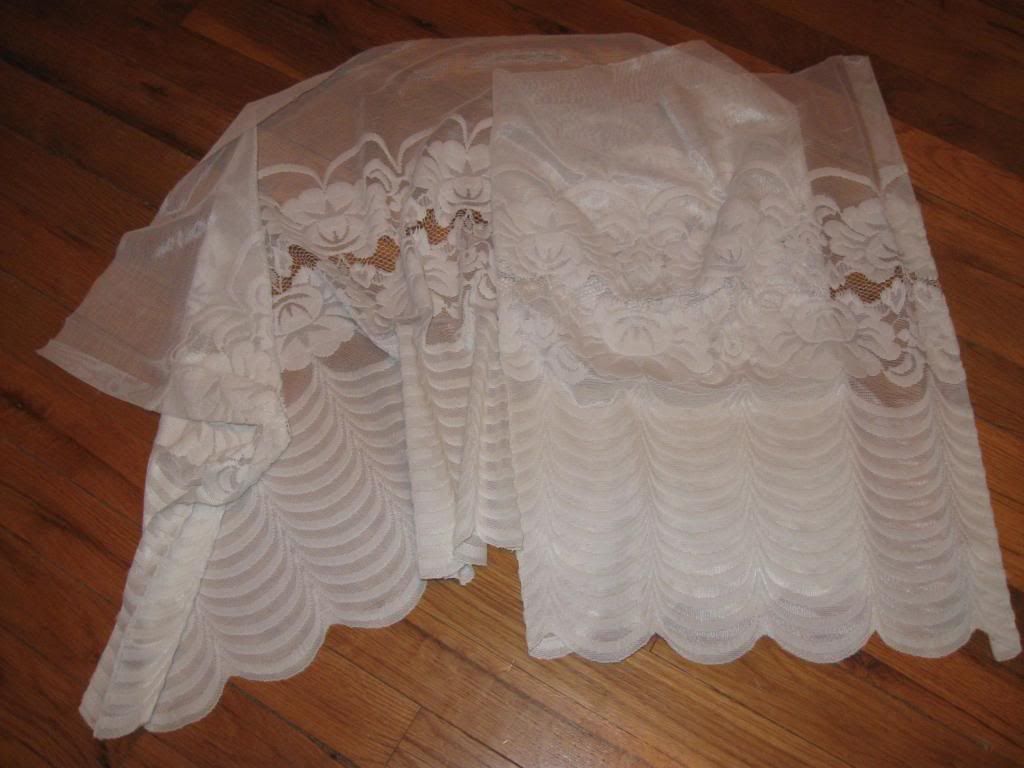
There resided in my refash-stash a long, beautiful curtain
that had the most lovely of scalloped edges.
that had the most lovely of scalloped edges.
It was meant to be a skirt!
In order to get all of the width I could, I made sure to seam rip the folded side seams.
Then I pinned the edges together and sewed them down,
creating a tube like the rest of my skirt tiers.
While I had the lace under the machine, I had sewn some gathering stitches
at either side- when I pinned the lace to my bottom green tier, I lined these
gathered sections up with both of the side seams on my green skirt tier.
Once it was all pinned, I basted the two layers together.
Now it was time to connect the two tiers!
This is what it looked like after all the sewing.
To add a little interest, I sewed a few rows of lace
down the center of the skirt.
This required a little unpicking at the bottom and top in order to
get the lace inserted into the seams, but it wasn't too difficult.
Add a couple of matching buttons, and it was a wrap!!
The buttons and lace add so much, in my opinion.
Here you can see the gentle falling of the lace where it was gathered at the sides.
The waist band was so easy, but gives it a great finished look!
I really enjoy the length of this skirt.
Not only does the bottom lace panel look so pretty, but it gives the skirt a lovely weight!
And it was warm.
Very warm.
Don't be fooled by the cardigan, things are still plenty warm here in Texas!
I was roasting while taking these pictures.
So why wear the cardi?
One word. Mosquitos!
We recently had a scrumptious, cloudy, rainy day!
It was heavenly.
The resulting mosquitos?
Not so much.
.jpg)
Aaannnd a couple shots that have nothing to do with the skirt.
The sunset was so beautiful, my photographer had to capture it.
This gives me the perfect excuse to direct your attention to the cute little flower pin
I made with some of the scraps!
I think it ties the whole look together, don't you?
And there you have it, week 2 completed!
Be sure to cast your vote for your favorite refashion this week!

.jpg)






.jpg)
.jpg)
.jpg)
.jpg)
.jpg)
.jpg)
.jpg)
.jpg)
.jpg)
.jpg)

